Home > Factory Productivity and Scheduling > Advanced Topics > Attachments > Adding Folders
Adding Folders
To add more than one Attachment to a Product in a Job, a folder will need to be created to save them in - for example, you may choose to create a folder with the same Job Number and save multiple files in that folder.
Note that if an Attachment has already been uploaded to a particular Job, before adding a folder, that Attachment will need to be deleted.
To add a folder
1. From the Main Menu select Job > Edit. Select the Job Number to be edited. You should see a page similar to

2. Clicking on the Attachment button (highlighted above) will display a pop up page similar to

3. Click on the Create Folder button (highlighted above). You will be prompted for a folder name - in this case we will use 70222 - see below

4. Finally click on Choose Files to add Attachments - for more information see Adding Attachments. However now it is possible to hold down the shift key and select multiple files. There is no limit on the number of files you can attach.
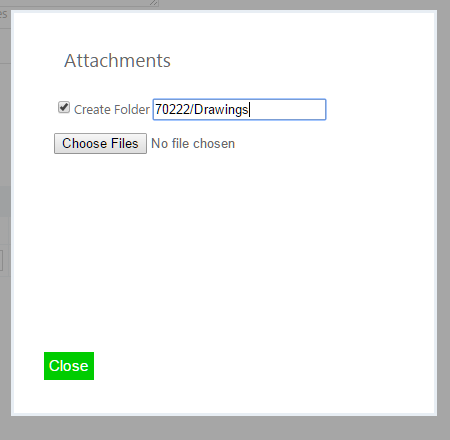
5. It is possible to create folders within folders (i.e. sub folders) by using a forward slash followed by the name of the sub folder.
For example, to create a sub folder called Drawings in the folder 70222, add /Drawings to the folder - see below

6. When a file or files are now chosen, they will be saved in the 70222/Drawings folder.
See also
| 


