| | Home > Factory Productivity and Scheduling > Advanced Topics > Advanced Scheduling Topics > Viewing Schedules > View Employee Schedule
View Employee Schedule
It is possible to view the Schedule for a week from the Employee's perspective - ie display the various Tasks that each Employee has scheduled for each day.
To view the Employee Schedule
1. Firstly, ensure each Employee to be displayed on the Schedule has the Show In Employee Schedule check box ticked.
To do this, from the Main Management Menu go to Set Up > Employee and click on Edit next to the Employee to be displayed in the Employee Schedule. You should see a page similar to

Ensure that Show In Employee Schedule check box is set to on (as highlighted above).
2. Secondly, from the Main Management Menu go to View > Scheduling > Employee Schedule.
It is possible to filter this page based on Tasks Status (ie Active / On hold or Yet to Start), Employee and Sub Factory - see highlighted below.
Note that showing by Employee will display a monthly view.

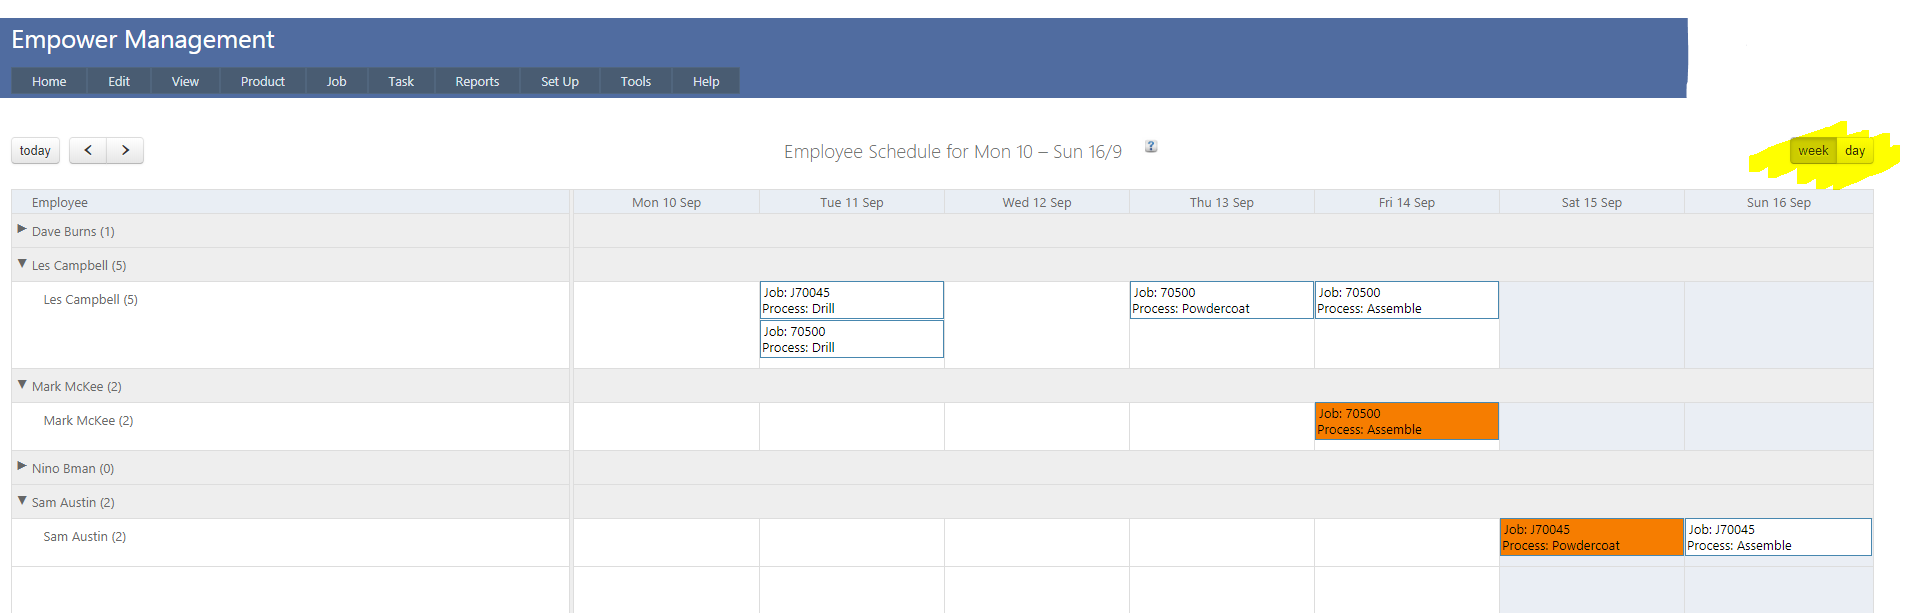
By default all Tasks are displayed. So you should see something similar to

Clicking arrows next to the Employee's name hides or displays the Tasks for that Employee - see below.

The following should be noted
1. Each Task is displayed on the day it is scheduled. If there is more than one Task scheduled on a particular day, the Tasks displayed on that day are ordered by Job Priority.
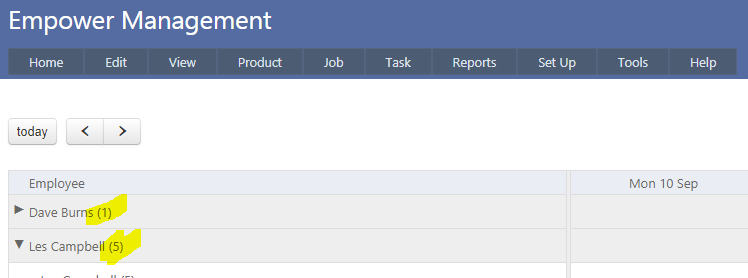
2. The number in brackets after each Employee's name (see highlighted below) is the number of Tasks scheduled for that Employee for the week.
3. By default, the color of the Task shows the Task's status - white is Yet To Start, green is Active, and Orange is On Hold. Finished Tasks are not displayed. For more color options see Scheduled Task Colors.
4. If there are large numbers of Tasks for any given day you can also view Tasks in a daily view rather than in a weekly view. To do this, at the top right hand side of the page select the day button (see highlighted below).
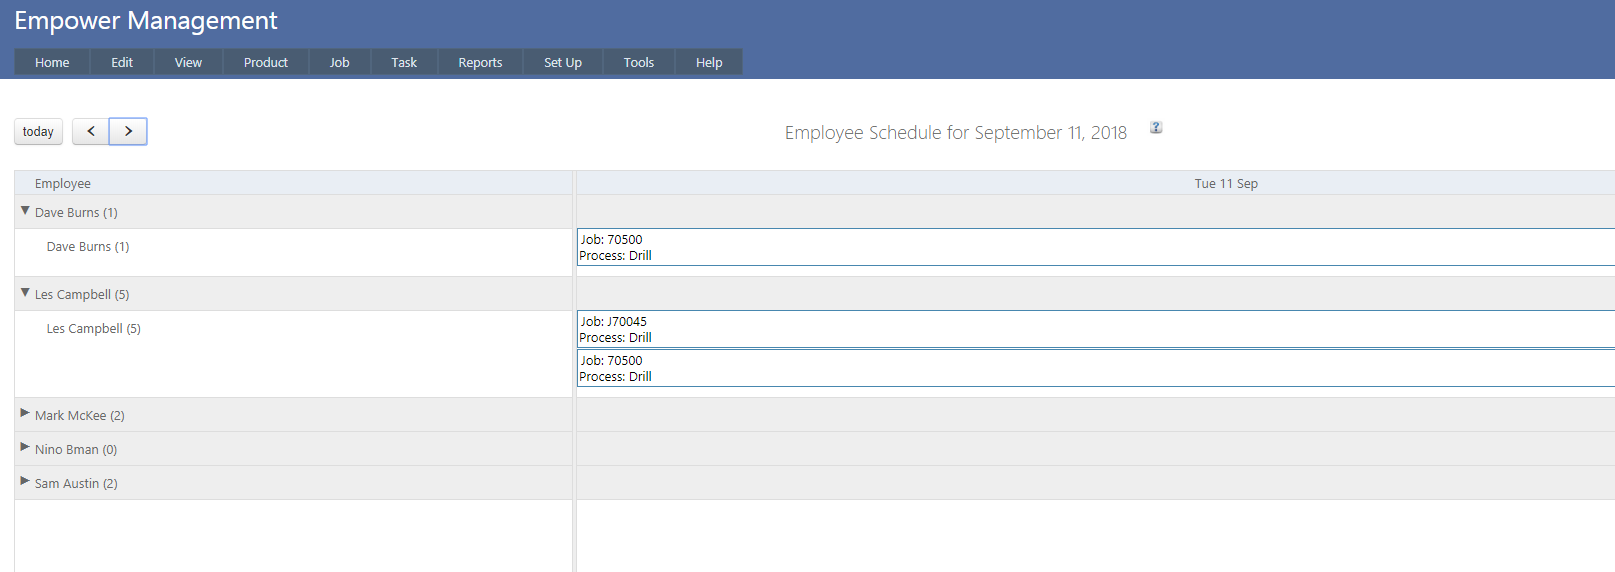
For example, selecting day will display the Tasks for a day - see below
5. Tasks can be dragged and dropped from one day to the next - for more information see Moving Scheduled Tasks.
6. Clicking a Task will display the Edit Task page - as per below - for more information see Editing Tasks.

7. Weekends can be hidden or displayed in Tools > Settings - for more information see Hide Weekends
8. The data displayed on the schedule can be altered - for more information see Adding Fields to the Schedule.
9. Scheduled dates for Tasks for a particular Job can be seen in the Job > View Job page - see Viewing Jobs.
10. Company Vacations and Employee Leave will be also be displayed - see Vacations and Scheduling and Managing Leave.
11. It is possible to Assign additional Employees to Scheduled Tasks from this page.
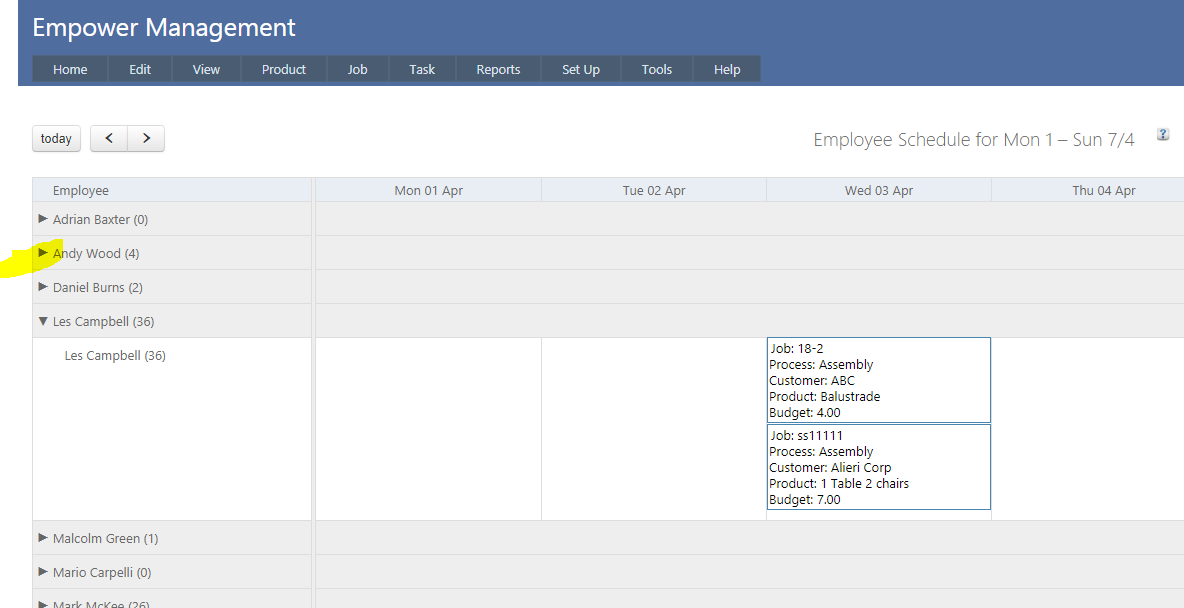
To do this firstly click on the Arrow next to the Employee to be Assigned the Task (see highlighted below) to expand the Tasks for that Employee.
To Assign a Task to that Employee click on a blank part of a day for that Employee (see highlighted below).
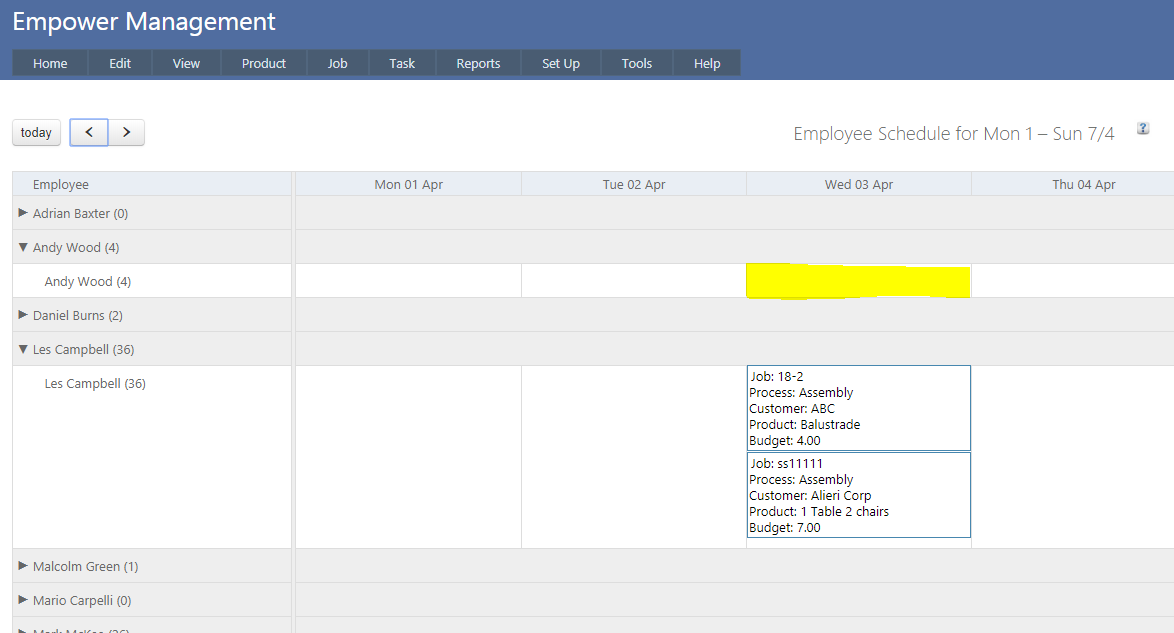
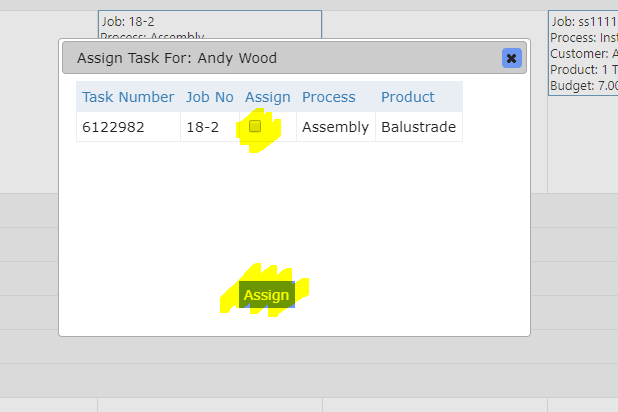
This will display a list of Tasks Scheduled for that day that have not already been Assigned to that Employee.
Enabling the Assign check box and clicking on the Assign button (see highlighted below) will Assign this Task to the Employee.
Multiple Tasks can be checked and Assigned at once.
See also
|
|